

White Sands National Park Photography Guide: Best Times, Gear & Pro Tips
How to Photograph the World's Largest Gypsum Dune Field
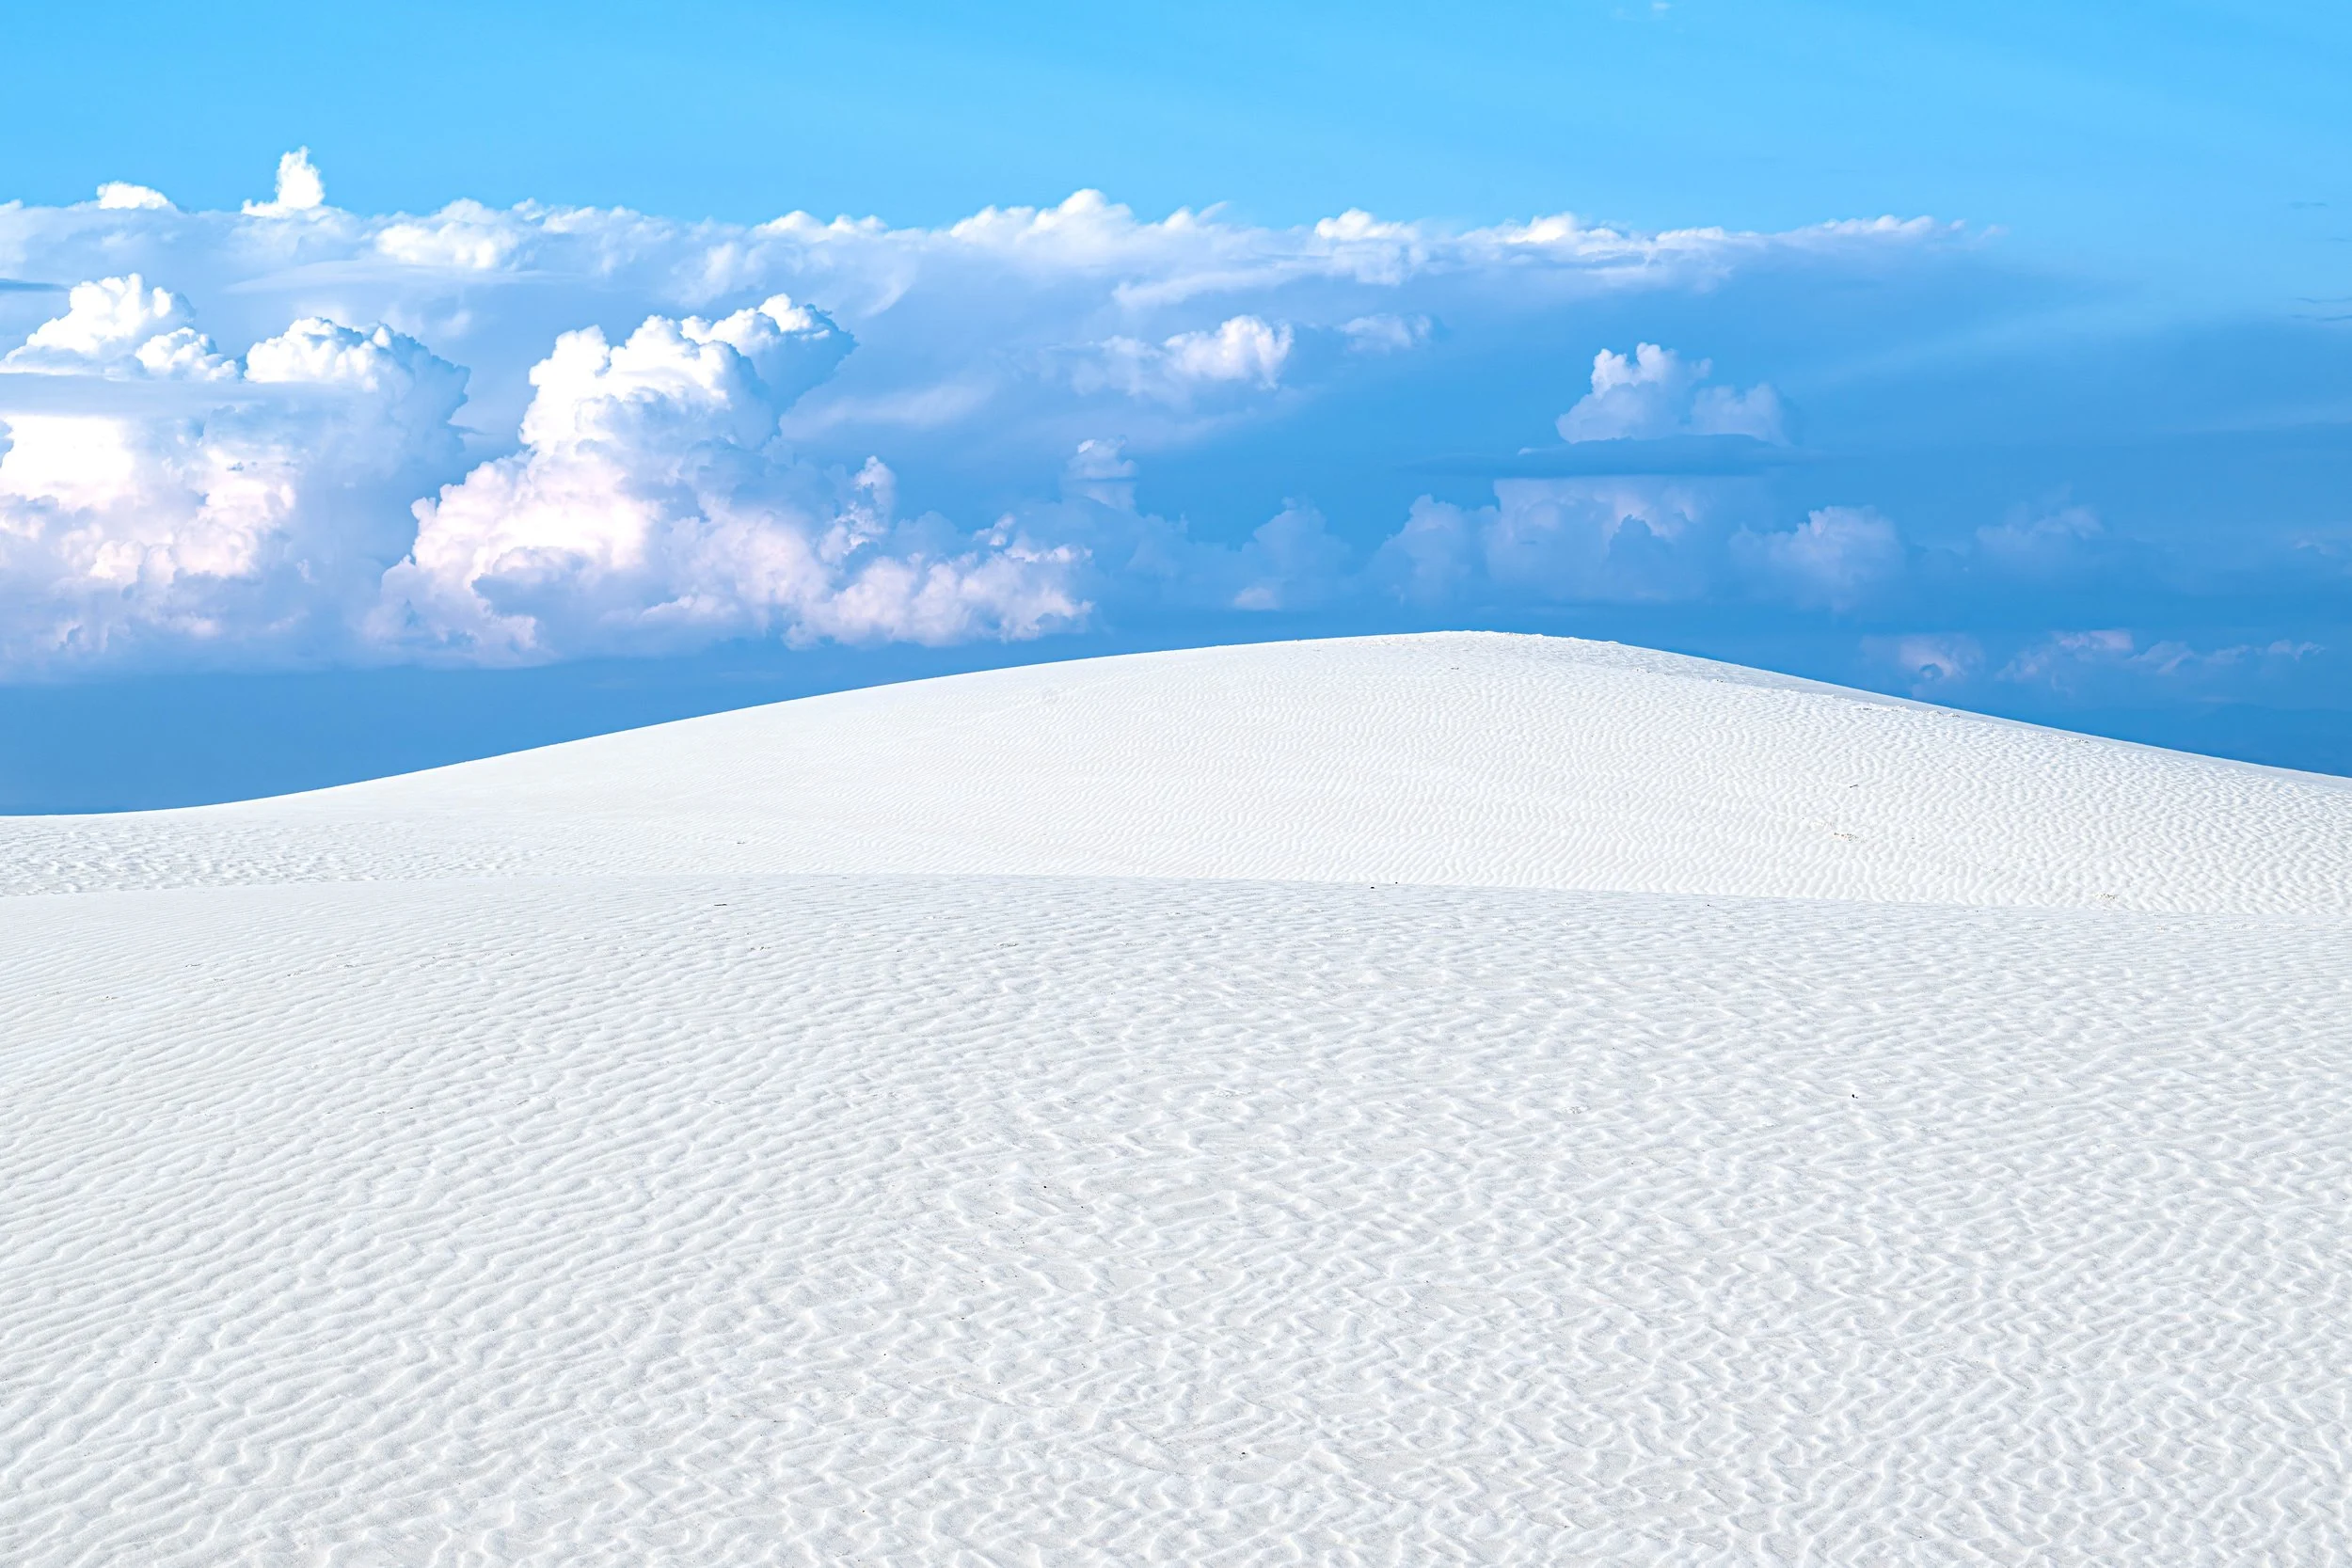
White Sands National Park gypsum dune and clouds | ISO 200, 104mm, f/11, 1/100 sec
🎯 In case you were looking for this …
Is the sand at White Sands National Park hot?
No, the sand at White Sands is almost never hot. Unlike typical beach or desert sand made of quartz, the dunes here are composed of gypsum crystals. Because gypsum reflects the sun's energy rather than absorbing it, the sand remains cool to the touch even on 100°F summer days, making it perfectly safe to walk on barefoot.
First things first, here’s a quick overview of the optimal times and suggested locations for photographing White Sands.
| Location / Event | Approximate Time (October) | Photography Activity | GPS Coordinates |
|---|---|---|---|
| Sunrise Session - Interdune Boardwalk |
07:00 AM | High-key textures; overexpose +1 stop | 32.7872° N, 106.3257° W |
| Alkali Flat Trail | 08:00 AM - 12:00 PM | Pristine ripples; deep dune hiking | 32.8211° N, 106.2755° W |
| Midday Abstracts - Dunes Life Nature Trail |
12:00 PM - 03:00 PM | Minimalist patterns; plant silhouettes | 32.7872° N, 106.3257° W |
| Sunset Session - Alkali Flat Trail |
3:00 PM - 06:45 PM | Glow-up dunes; pastel color shifts | 32.7872° N, 106.3257° W |
| Blue Hour - Your Choice! | 6:45PM - 07:45 PM | Ethereal moonscapes; long exposures | 32.7872° N, 106.3257° W |
Quick Facts: White Sands National Park
Location: Southern New Mexico, near Alamogordo
Distance from Albuquerque: 230 miles (3.5 hours)
Best Photography Times: Sunrise (plus one hour), sunset
Entrance Fee: $25 per vehicle (7-day pass)
Hours: 7 AM to sunset daily
Best Trail: Alkali Flat Trail (hardest but most pristine dunes)
Essential Gear: 70-200mm lens, wide-angle lens (24-70mm), blower for dust removal
Weather: mild October (70-80°F); Hot summers (100°F+)
Why White Sands is a Photographer's Dream
White Sands National Park isn't actually sand—it's hydrous calcium sulfate, better known as gypsum. This distinction matters because gypsum crystals create an otherworldly landscape unlike anything else on Earth. The brilliant white "sand" forms massive dunes that ripple like ocean waves across 275 square miles of New Mexico's Tularosa Basin.
For photographers, White Sands offers:
Minimalist Compositions: Pure white curves against blue sky
Incredible Texture: Wind-carved ripples that catch raking light
Unique Color Palette: Gypsum bounces soft, ethereal light at sunset
Surreal Scale: Dunes 60 feet high stretching to the horizon
Rare Accessibility: You can walk anywhere (carefully)
Walking on White Sands feels like walking on snow, but cool to the touch even at midday. The surface has a velvet texture, and the acoustics in the park are strangely muted.
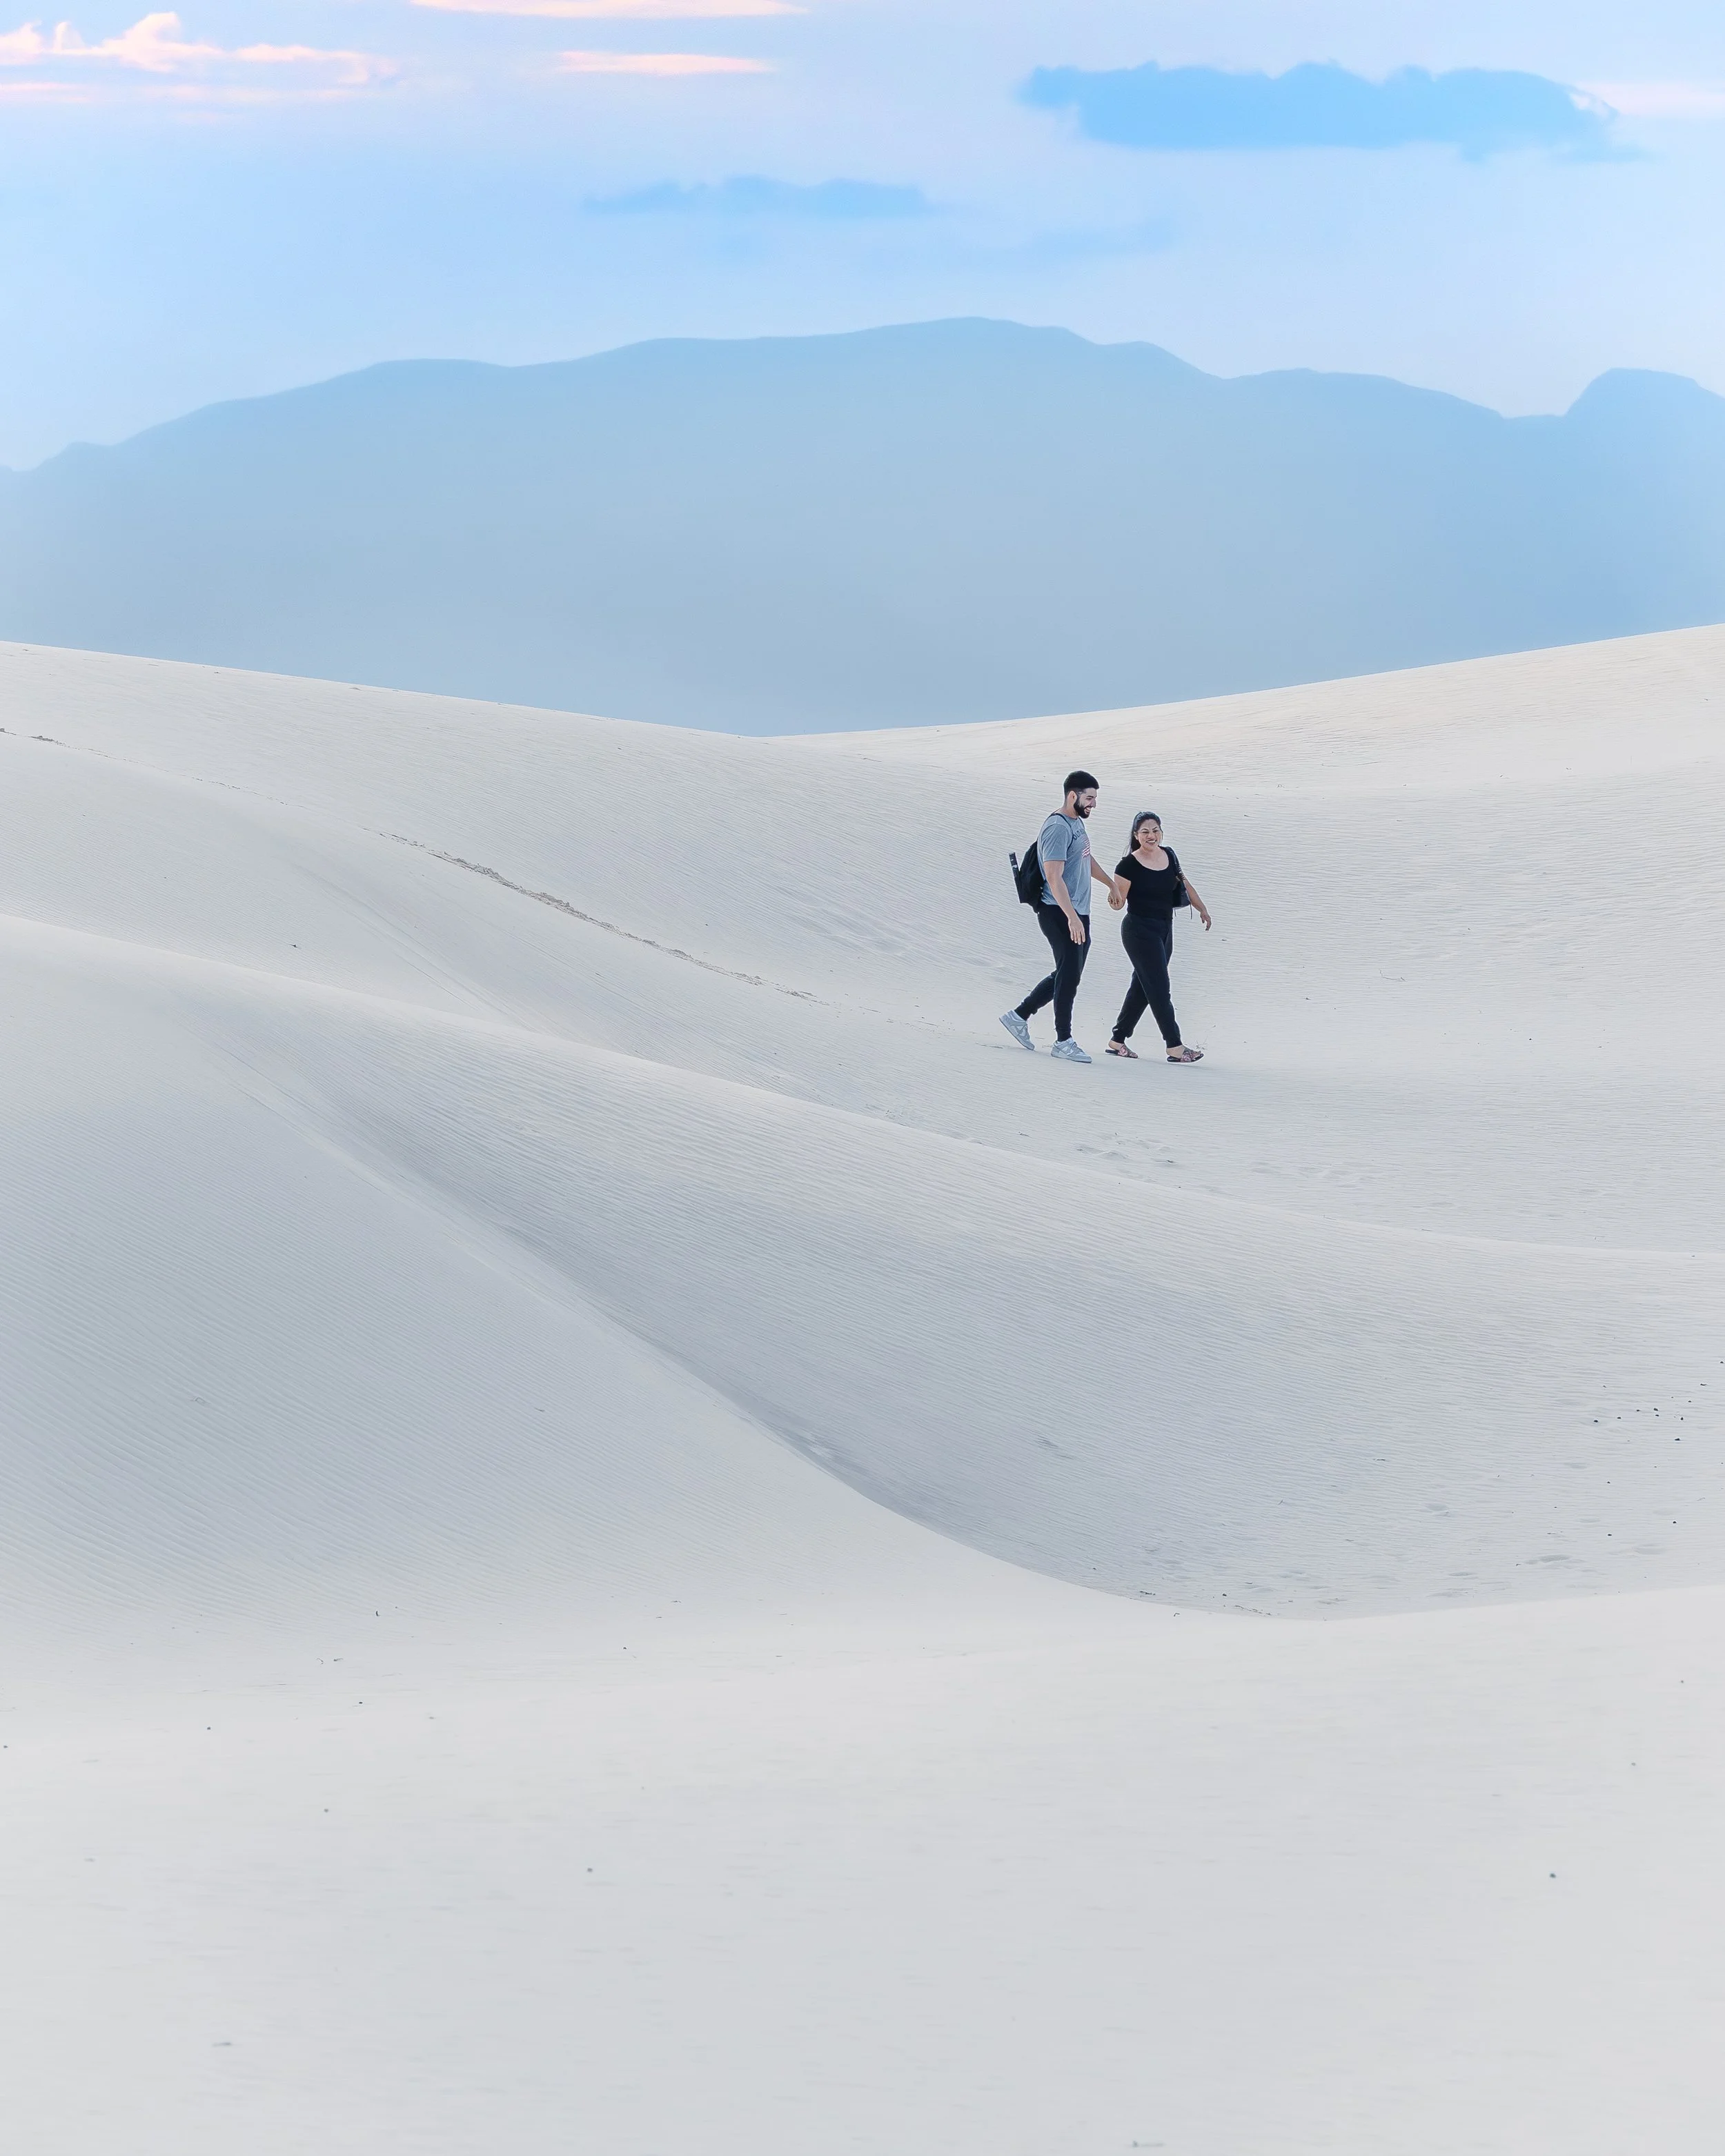
Walking on the dunes at White Sands National Park
A couple walks on the dunes near sunset with mountains in the background.
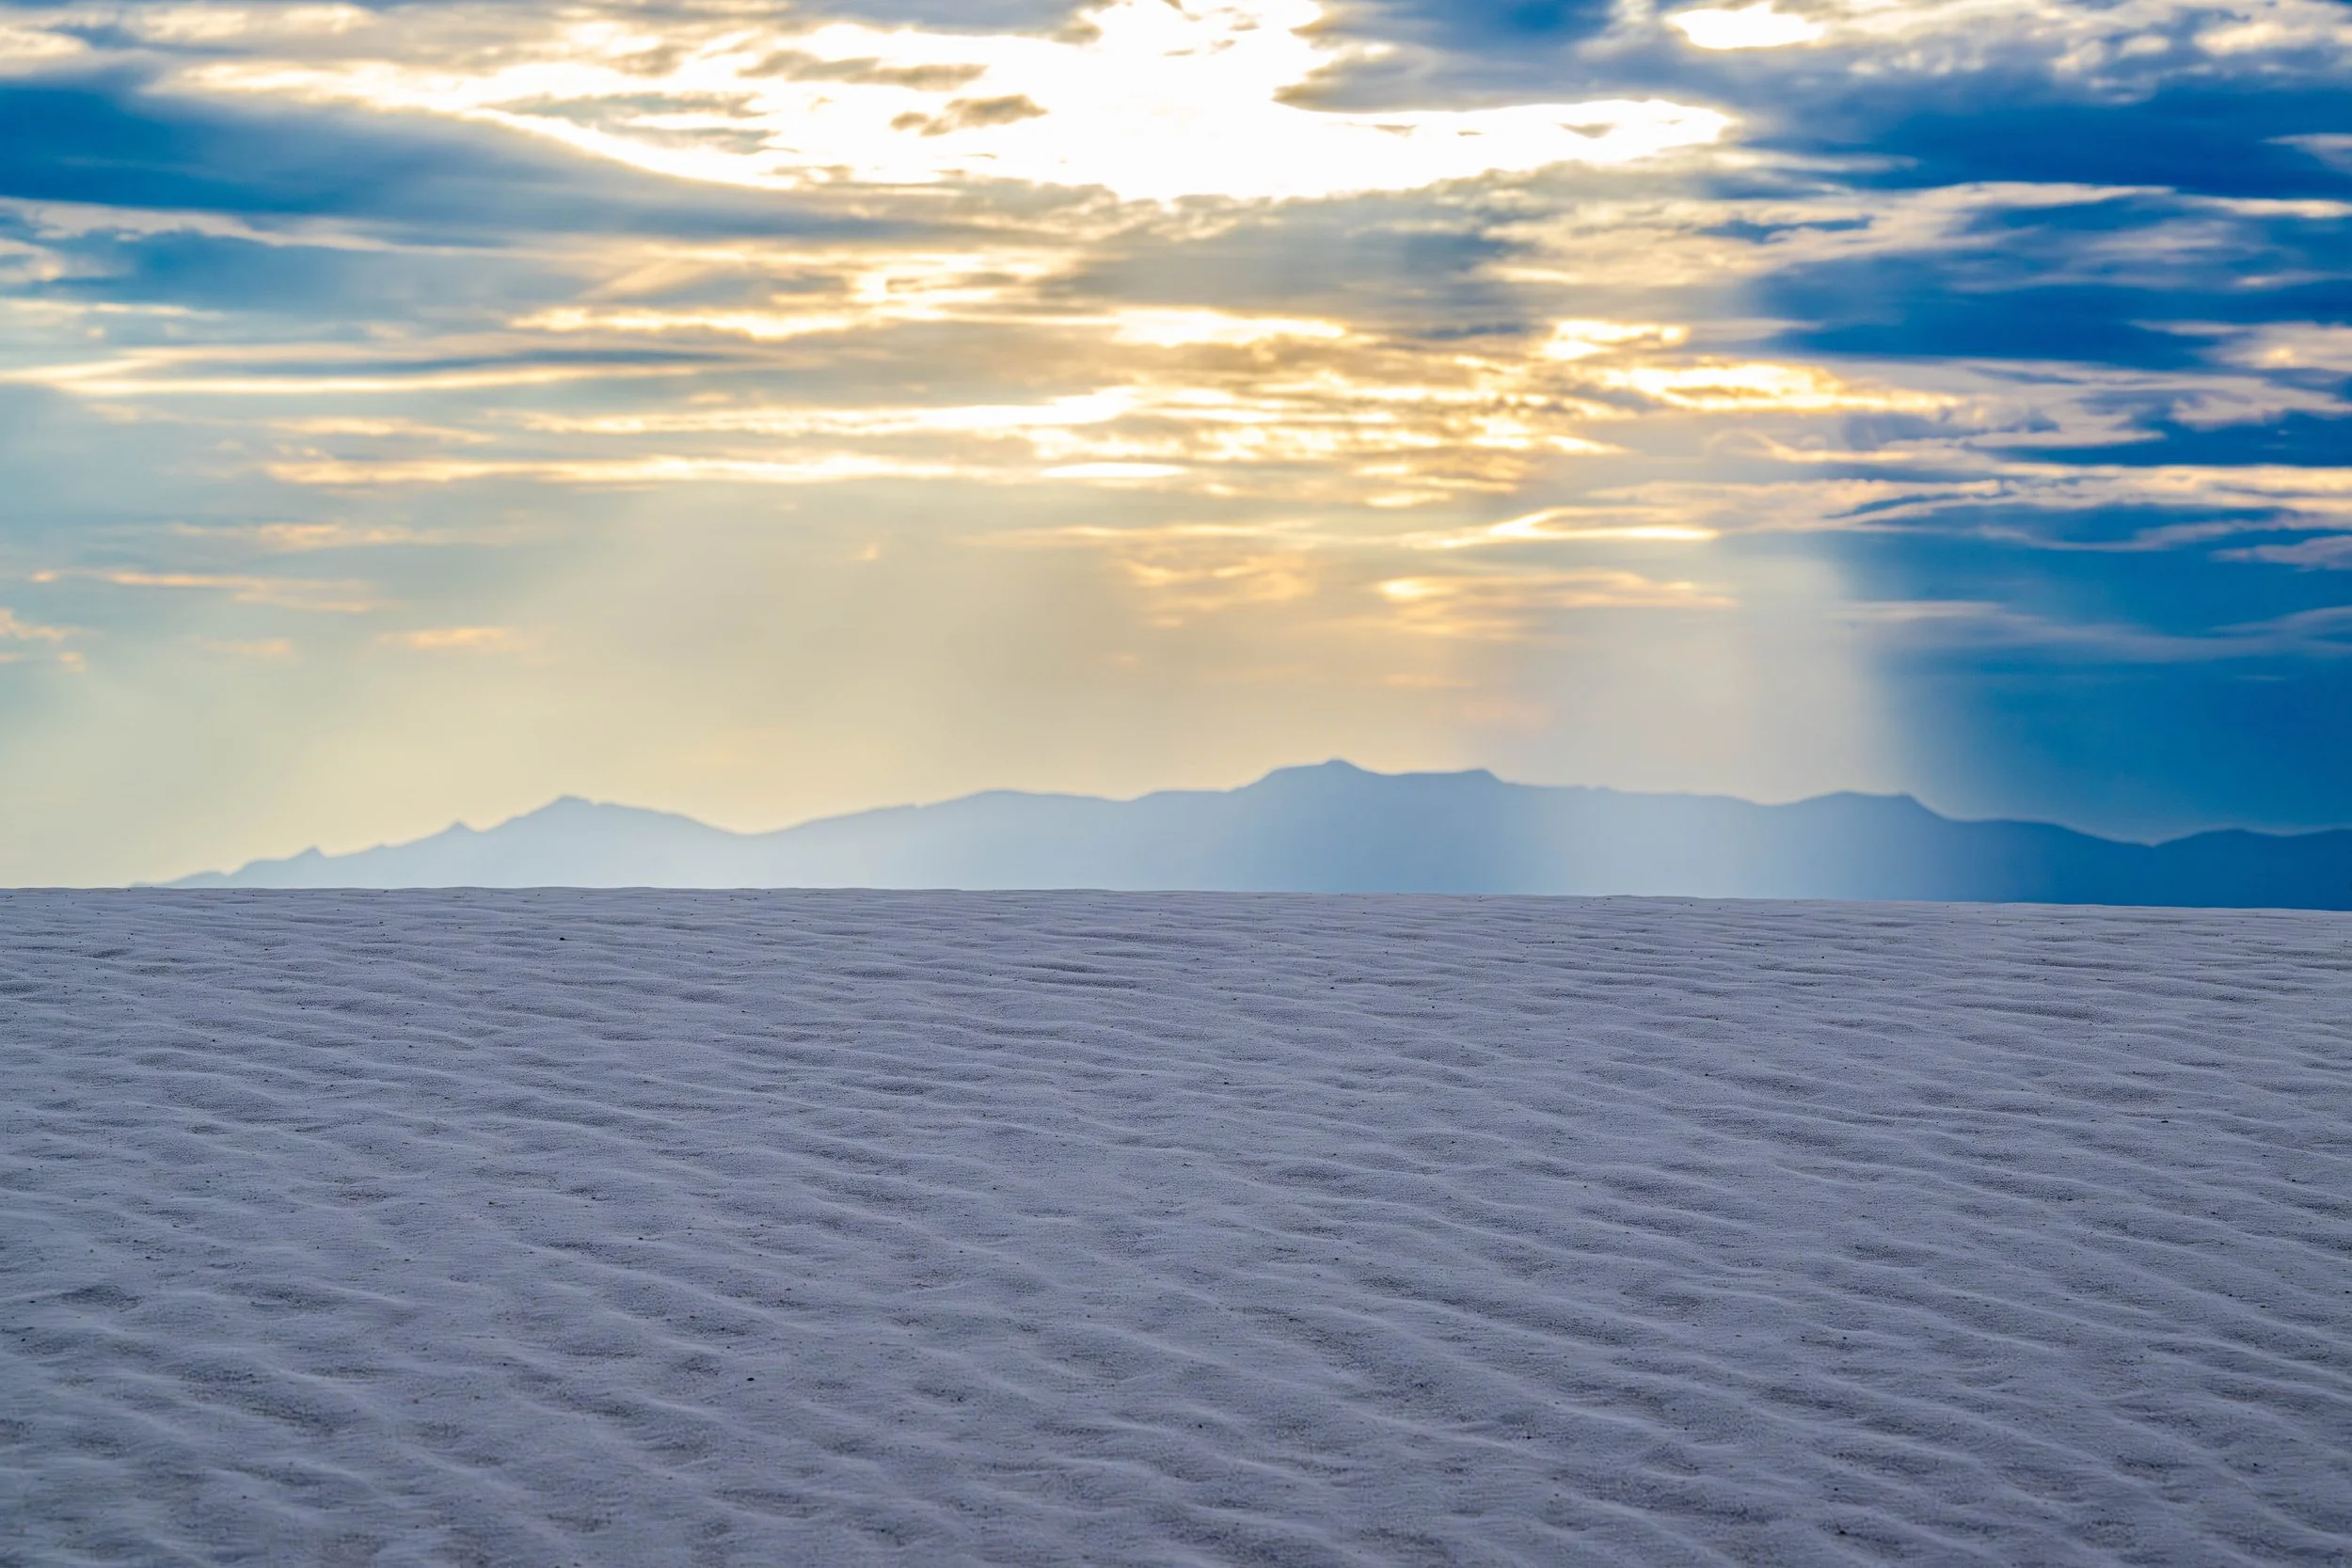
The Science Behind the White in White Sands National Park
Even at sunset the dunes remain more white than tan or gold. | ISO 200, 70mm, f/4.5, 1/800 sec
Understanding White Sands' origins helps you appreciate what you're photographing:
How the Dunes Formed
Around 70 million years ago, the Rocky Mountains' formation pulled Earth's crust apart, creating the Tularosa Basin. Water from surrounding mountains flowed into this depression, forming ancient Lake Otero. This lake collected dissolved gypsum from the mountains.
When the climate warmed after the last Ice Age (about 10,000 years ago), Lake Otero evaporated, leaving massive gypsum deposits. Wind and water erosion broke these deposits into sand-sized crystals, which prevailing southwest winds sculpted into the dunes we see today.
Why the “Sand” at White Sands National Park Isn’t Yellow/Brown
Most sand dunes are composed of quartz (silicon dioxide), which appears tan or brown. White Sands' gypsum is calcium sulfate, which is naturally white. The purity and fine grain size create the brilliant, almost snow-like appearance.
Why It Stays Cool
Unlike quartz-based sand that absorbs and retains solar heat, gypsum reflects light and doesn't heat up … even on scorching 100°F summer days.
More Detail About the Best Times to Photograph White Sands
Sunrise (Recommended)
Arrival: Dawn ~7:00 AM in October
Light Quality: Raking light from the east (Sacramento Mountains)
Why Sunrise is Optimal:
The light is surgical and directional, creating sharp shadows that define every ripple
Perfect for high-key photography—overexpose by +1 or even +2 stops to keep whites brilliant
Look for "dune spines"—the knife-edge ridges catch golden light while shadows remain deep
Far fewer crowds than sunset; fewer footprints in the dunes
Cooler temperatures for comfortable hiking
Best Locations for Sunrise:
Alkali Flat Trail (hike 3-4 ridges deep for pristine ripples)
Interdune Boardwalk (if mobility is limited)
Sunset (Most Popular)
Occurs: 6:45 PM in October; 8:00 PM in summer
Light Quality: Warm, glowing, with pastel color shifts
Why Sunset is Magical:
The white dunes don't go dark—they glow with reflected color from the sky
As the sun dips toward the San Andres Mountains (west), the gypsum bounces soft pinks, oranges, and purples
Blue hour after sunset creates a surreal moonscape effect
Warmer for those who don't like early mornings
Composition Tip for Sunset: Shoot due east for sapphire-blue skies with white puffy clouds to offset the white sand. The sun behind you illuminates dunes while creating dramatic sky contrast.
Sun rays land on a gypsum dune during sunset at White Sands National Park | ISO 1250, 140mm, f/18, 1/400 sec
Midday
Time: 11 AM - 3 PM
Why It Works:
Overhead sun eliminates shadows—perfect for abstract patterns and textures
Detail shots of plants, footprints, and wind patterns
People on dunes create strong silhouettes
Less ideal for wide landscape shots (flat, harsh light)
Pro Tip: Your camera's meter will want to render the white sand as middle gray. You MUST overexpose to maintain its white color. Check your histogram—it should be pushed to the right (but not clipping highlights).
Full Moon Nights (Special Permit Required)
White Sands offers full moon hikes once per month from May through October. The white dunes glow under moonlight, creating an ethereal nightscape. Long exposures capture otherworldly scenes.
Note: Requires advance reservation through Recreation.gov. Sells out quickly.
Photography Composition Techniques for White Sands National Park
1. Emphasize Leading Lines
Get LOW—position your camera inches from the sand. The wind-carved ripples create natural leading lines that draw the eye through your frame. Shoot parallel to ripple patterns for maximum effect.
2. Include a Subject for Scale
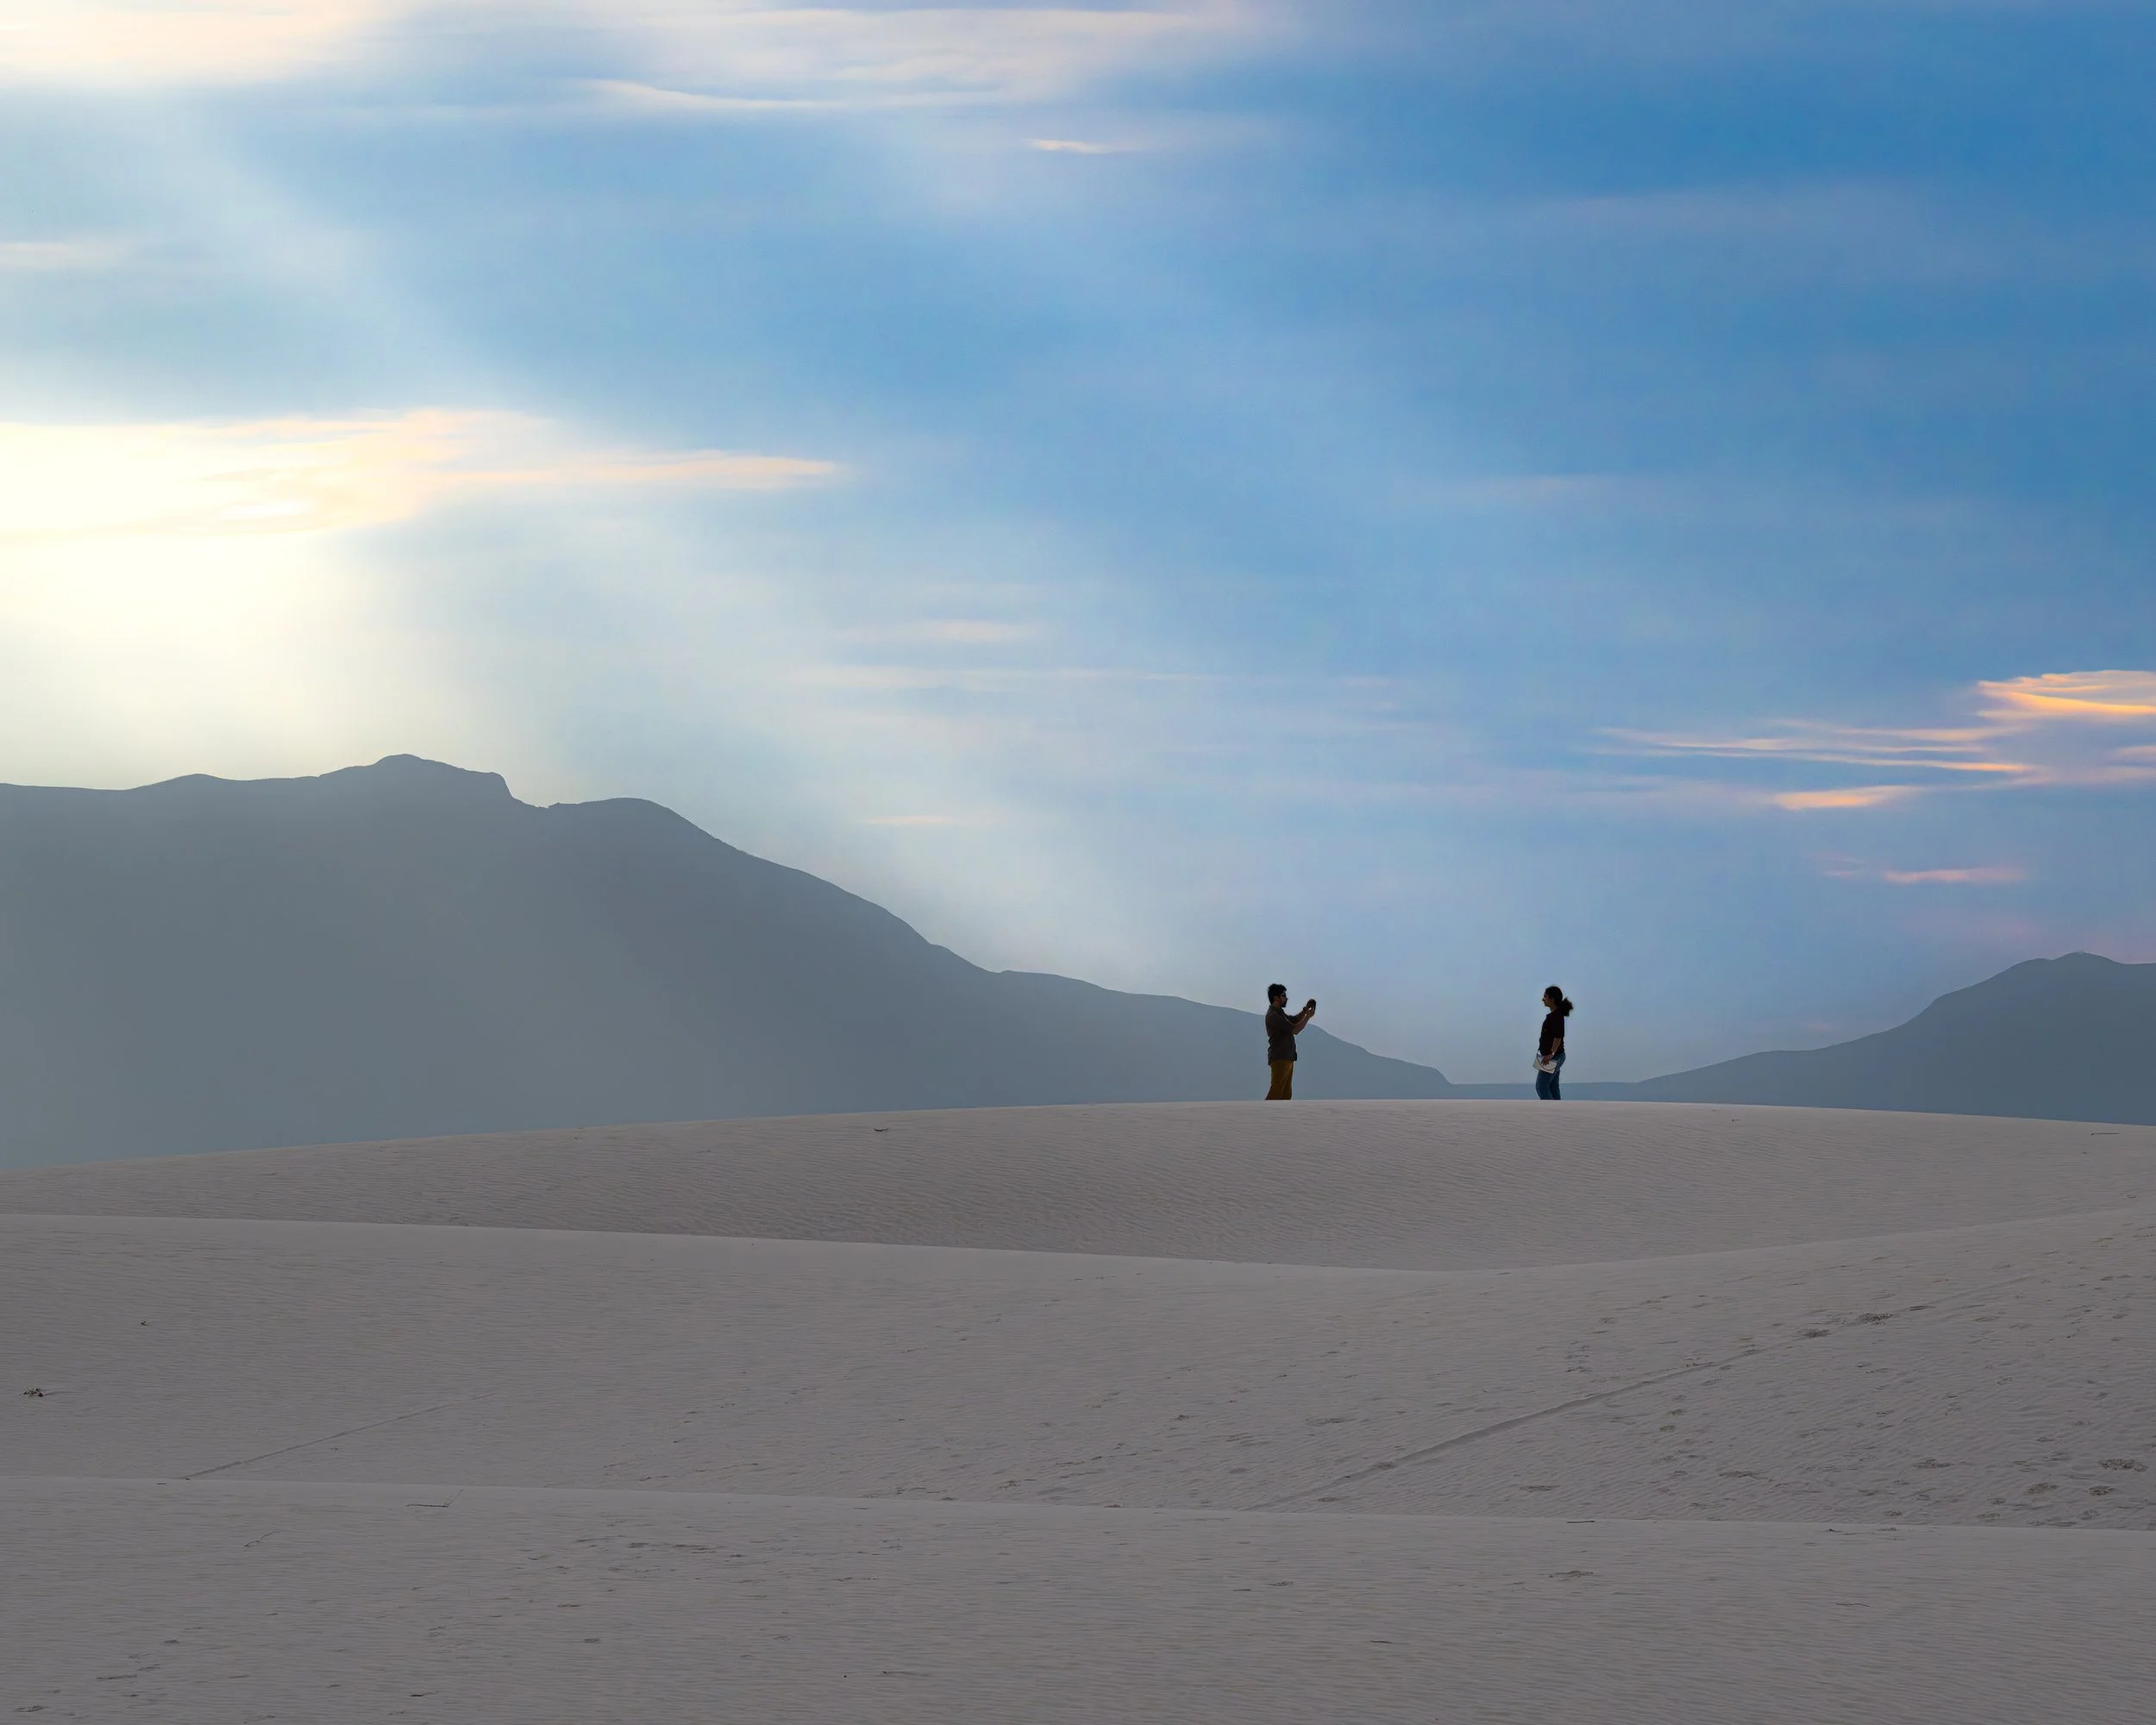
A silhouetted couple takes a photo on the dunes of White Sands National Park | ISO 1250, 200mm, f/18, 1/800 sec
The dunes are so vast that without scale indicators, photos can feel flat. Include:
People (ask them to wear colorful clothing for contrast)
The sparse plants (soaptree yucca, four-wing saltbush)
The mountains
Your own shadow (creative and provides scale)
3. Work the Sky
White Sands photographs beautifully with dramatic skies. If clouds are present, use them. If skies are clear, shoot for the contrast between sapphire blue and brilliant white.
Polarizing Filter: Use sparingly. It deepens blue sky but can create uneven polarization in wide-angle shots.
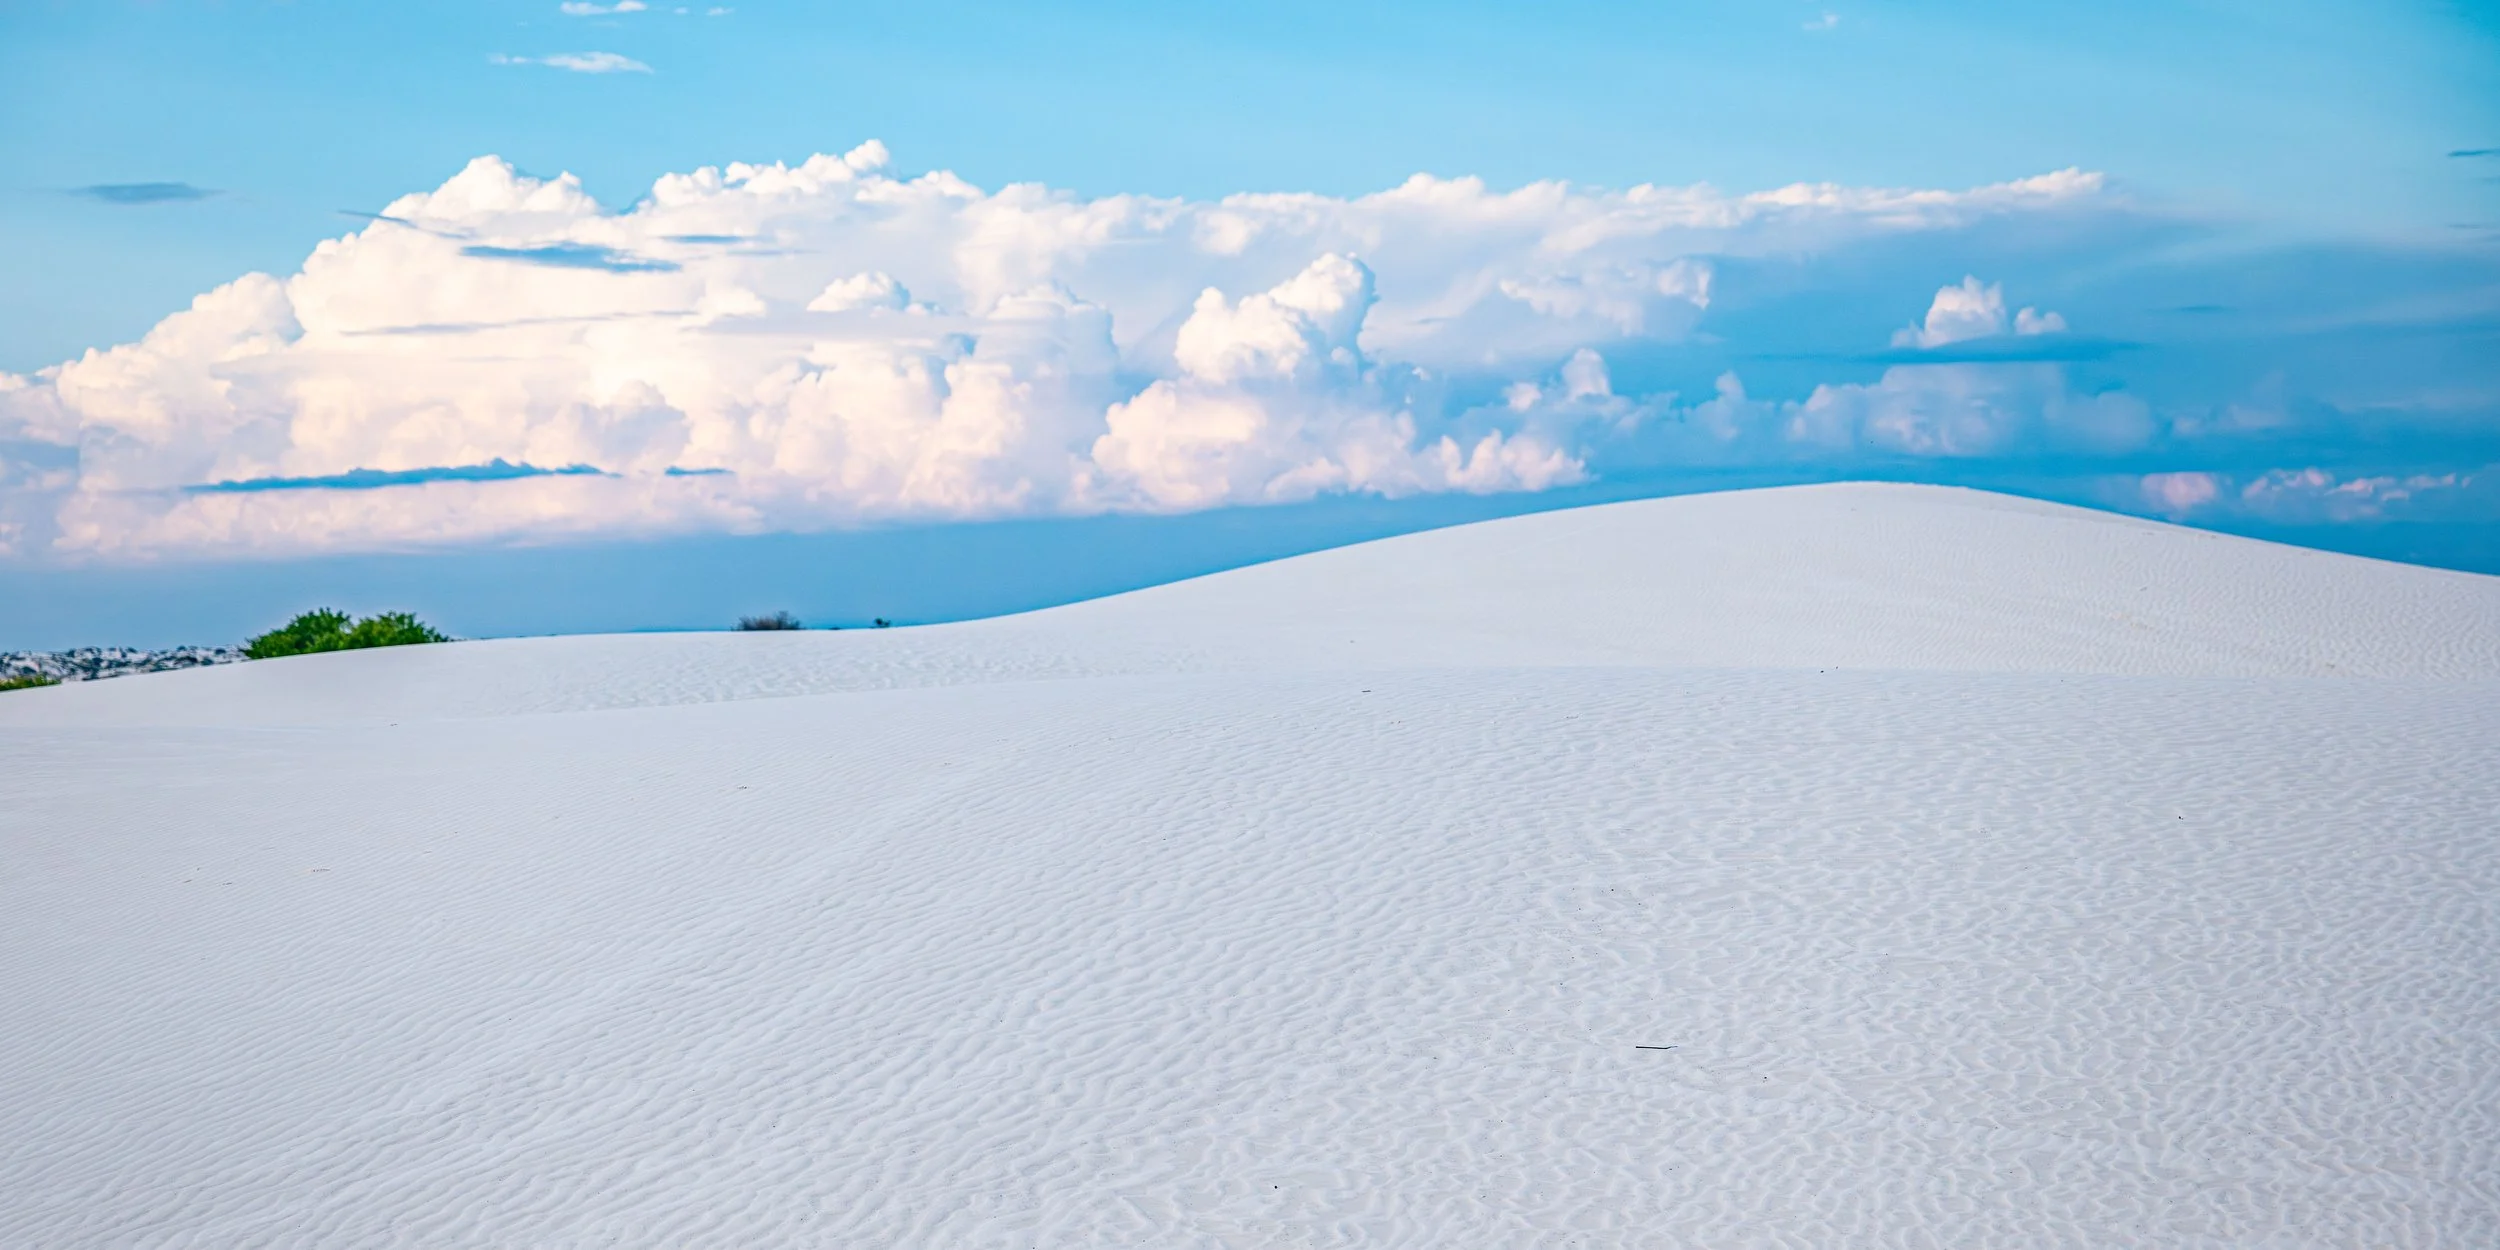
Green brush on the top of a gypsum dune at White Sands national Park | ISO 320, 70mm, f/3.5, 1/3200 sec
4. Silhouettes at Sunset
Position people on dune crests and expose for the sky. The white dunes will glow while your subjects become graphic silhouettes.
5. Minimalism
White Sands naturally lends itself to minimalist photography. Embrace negative space. A single yucca plant against white dunes and blue sky can be more powerful than cluttered compositions.
White Sands National Park
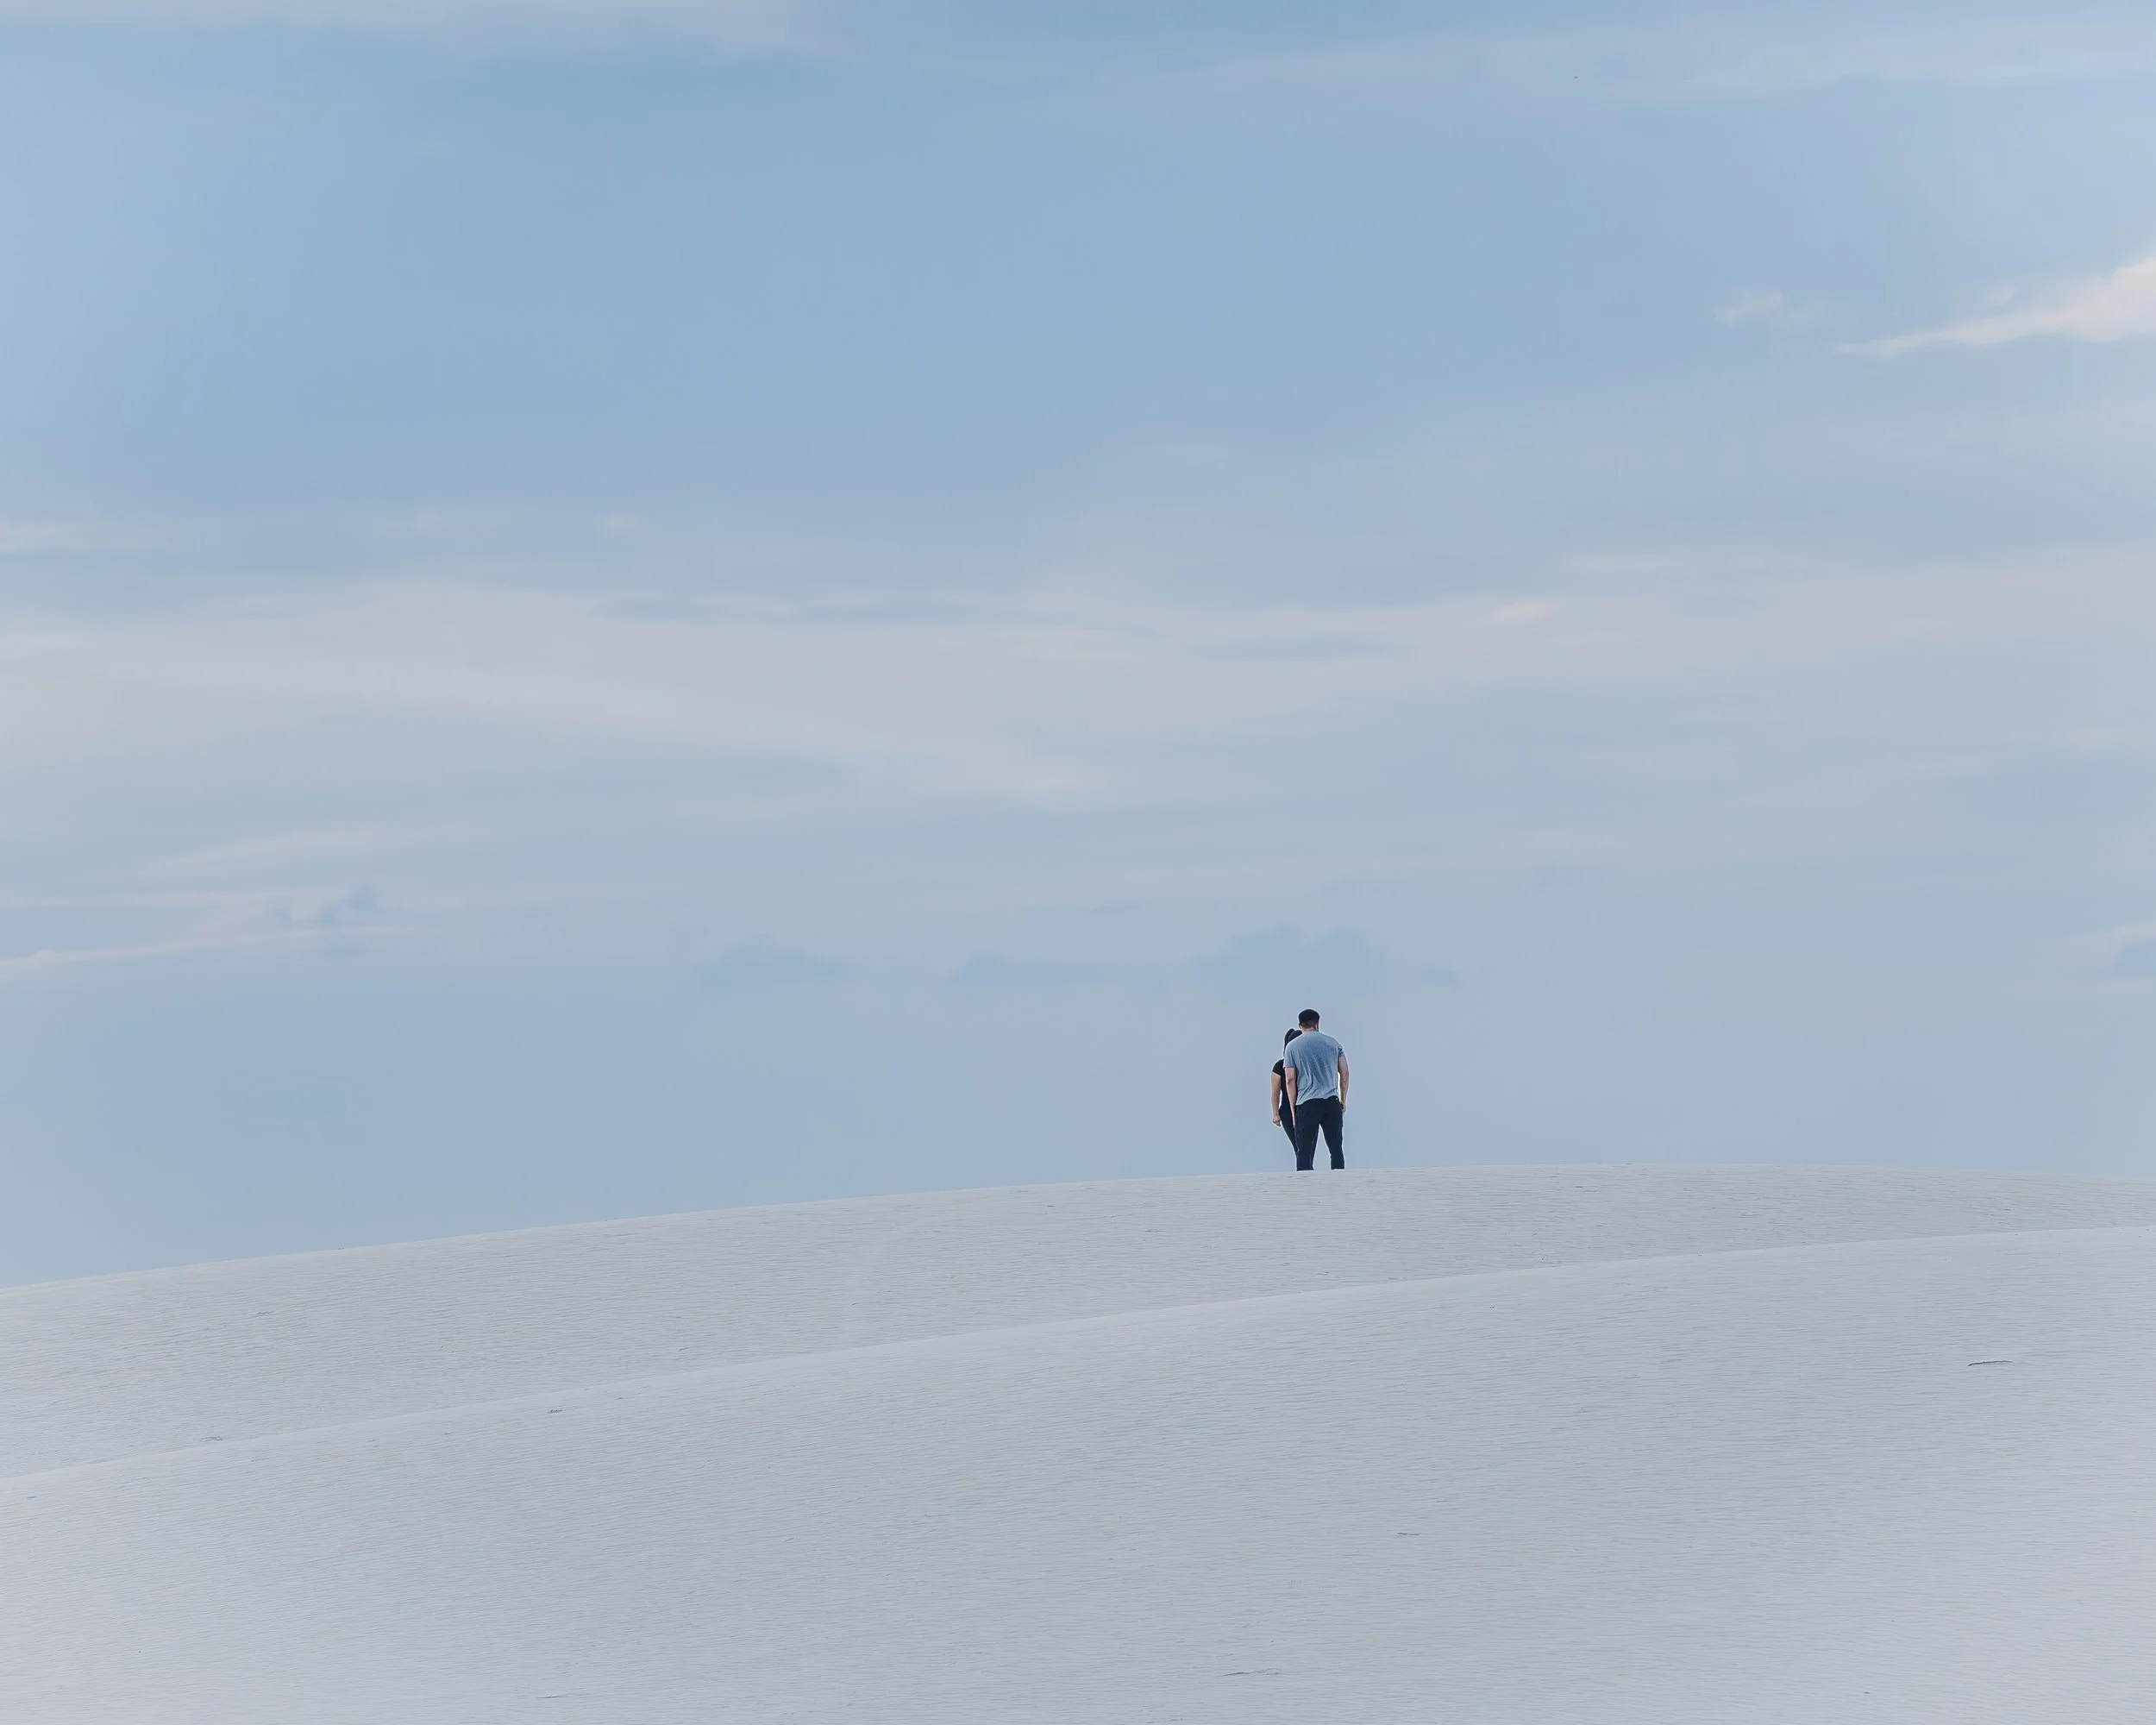
A couple standing on the dunes near sunset | ISO 1250, 200mm, f/7.1, 1/1600 sec
6. Focus on Textures

White Sands National Park dune textures
Varied dune structures and heights create different textures in the gypsum sand | ISO 1250, 190mm, f/18 1/200 sec
At midday when landscape light is harsh, zoom in on:
Ripple patterns
Footprints creating depth and layers
Plant details
Insect tracks in sand
————
The Best Photography Gear for White Sands National Park
Essential Camera Gear
Wide-Angle Lens (Essential): 14-24mm or 24-70mm for expansive dune compositions
Telephoto (Recommended): 70-200mm for compressed perspectives, distant dunes, silhouettes
Tripod: Useful but can be challenging in wind (which is common)
Remote Trigger: For sharp images on a tripod
Polarizing Filter: Deepens blue sky against white sand
ND Filters: For longer exposures
Rocket Blower: See gear protection section below
Two-Body Setup (Ideal)
Body 1: 24-70mm or 14-24mm (for wide scenes)
Body 2: 70-200mm (for detail and people shots)
Pro Tip: Your camera's meter will want to render the white sand as middle gray. You MUST overexpose to maintain its white color. Check your histogram—it should be pushed to the right (but not clipping highlights).
CRITICAL: Protecting Your Gear from Gypsum
Critical Rule #1: Never use a cloth to clean gypsum from your camera.
While gypsum is softer than glass (and likely won't scratch lenses), it's a fine powder that can:
Get pushed into lens grooves and seams
Become corrosive in high humidity environments
Contaminate your sensor if blown into the camera body
The Correct Cleaning Method:
Use a rocket blower (Giottos brand works great) to blast away gypsum
Never wipe—always blow
Wait until you're back at your car/hotel before thorough cleaning
Critical Rule #2: NEVER change lenses on the dunes.
White Sands is windy. Opening your camera body in this environment invites gypsum into the sensor chamber, which can be expensive to clean professionally, and could theoretically ruin your camera body. If you must change lenses:
Get inside your vehicle
Find a rest room / visitors areaEssential Visitor Information
Best Trails for Photography
Alkali Flat Trail (5-Mile Loop - Most Rewarding)
Difficulty: More strenuous
Photography Payoff: Highest
This trail takes you deep into the dunefield where tourist foot traffic vanishes. The key strategy: hike over at least 3-4 dune ridges before stopping to photograph. This gets you beyond sledders and casual visitors.
What You'll Find:
Pristine, wind-carved ripples untouched by footprints
360-degree white dunes with no visible landmarks
True sense of isolation and scale
Photography Tips:
Use the white trail markers to navigate—it's incredibly easy to get disoriented
Shoot low (inches from ground) to emphasize leading lines of ripples
Include any sparse vegetation for scale and color contrast
Watch your footprints—they're very visible. Either work them into compositions or carefully step in existing tracks
Safety Note: Stay within sight of trail markers. GPS may not work well, and a breeze can obscure your footprints. People get lost here every year.
Interdune Boardwalk (0.5-Mile Loop - Easiest)
Difficulty: Easy, wheelchair accessible
Photography Payoff: Moderate
This paved loop takes you between dunes, offering close-up views of plants and dune ecology. It's crowded but provides context shots and is great for families or those with mobility limitations.
Best For: Detail shots, plant life, educational context
Dunes Life Nature Trail (1-Mile Loop)
Difficulty: Easy to moderate
Photography Payoff: Moderate
Combines boardwalk and soft sand hiking. Good middle-ground option if Alkali Flat feels too ambitious but you want more than the Interdune Boardwalk.
Backcountry Camping Area (Advanced)
With a permit, you can backpack and camp deep in the dunefield. This allows for both sunset and sunrise photography without returning to the visitor center. Permits required; limited availability.
Entrance Fees & Passes
Private Vehicle: $25 (valid 7 consecutive days)
Motorcycle: $20 (valid 7 days)
Per Person (walk/bike): $15 (valid 7 days)
Children 15 & Under: FREE
America the Beautiful Pass: Accepted ($80 annual pass for all national parks)
Hours of Operation
Park Hours: 7 AM to sunset, daily
Visitor Center: 9 AM - 5 PM (Sept-May); 9 AM - 6 PM (Memorial Day-Labor Day)
Closed: December 25 (Christmas)
Military Testing Closures
Important: White Sands is located between Holloman Air Force Base and White Sands Missile Range. The park occasionally closes (usually for 2-3 hours) during military testing.
Highway 70 may also close temporarily. Check the park's closure schedule before visiting.
Getting There from Albuquerque
Distance: 230 miles / 3.5 hours
Route: I-25 South to US-70 West
Alternative Route (if coming from Phoenix): I-10 East to US-70 East (adds Saguaro National Park as a pass-through option)
Where to Stay
Nearest Towns:
Alamogordo, NM (15 miles): Multiple chain hotels; closest option
Las Cruces, NM (52 miles): Larger city; more dining options
Albuquerque (230 miles): Makes a long but doable day trip
Camping: No camping within White Sands National Park except backcountry with permit. Nearest developed camping at Oliver Lee Memorial State Park (12 miles).
How can I keep from getting lost in White Sands National Park?
Follow Trail Markers: Always look for the next trail marker from your current one; if you can't see it, turn back.
Use Technology: Download the NPS app, use GPS tracking (like on AllTrails), and carry a physical map (cell service is unreliable). Alternately, invest in a satellite device like the Garmin inReach.
Talk to a Ranger: Get current trail conditions and advice at the visitor center before hiking.
Carry Essentials: Bring plenty of water, salty snacks, sun protection, and tell someone your plans.
Stay Put if Lost: If you get lost, stay in one place and call 911, providing details like your trailhead and time hiked, to make rescue easier.
What to Bring
Water: 1 gallon per person (dehydration happens fast)
Sun Protection: Hat, sunscreen (SPF 50+), sunglasses
Sturdy Shoes: Hiking boots or sneakers (barefoot is possible but not for long distances)
Layers: Mornings cool; afternoons hot
Snacks: No food available in the park
Flashlight/ hiking headlight: If staying until sunset
Activities Beyond Photography
Sledding on the Dunes

A family sleds outside of White Sands National Park on a roadside dune at sunset | ISO 320, 42mm, f/3.5, 1/500 sec
White Sands' #1 non-photography activity! Plastic disc sleds are sold at the visitor center gift shop ($15-20). Buy wax too—without wax, friction on gypsum keeps you stationary.
Best sledding dunes are marked along the Dunes Drive. Look for steep, smooth faces.
Ranger-Led Programs
Full Moon Hikes: Monthly, March-November (reservations required)
Lake Lucero Tours: See the source of the gypsum (limited availability)
Sunset Strolls: Ranger-guided walks at golden hour
Picnicking: Designated picnic areas with ramadas (shade structures) are available. Bring your own food and pack out all trash.
Frequently Asked Questions
-
Sunrise and sunset offer the best light. Sunrise provides high-key conditions with raking light perfect for textures. Sunset creates glowing dunes with pastel colors. October is ideal weather-wise as it is not too hot.
-
Essential gear includes a wide-angle lens (14-24mm or 24-70mm). Recommended gear includes a telephoto (70-200mm) and a second camera body. Always bring a rocket blower for dust removal and never change lenses on the dunes.
-
Entrance is $25 per vehicle for a 7-day pass. The America the Beautiful National Parks Pass ($80 annual) is also accepted.
-
Yes! Sledding is a popular activity. Plastic disc sleds are sold at the gift shop. Be sure to buy wax; without it, friction on gypsum prevents sliding.
-
Yes, as long as you stay within sight of trail markers. It's easy to get disoriented as GPS is unreliable and breezes can erase footprints. Never hike alone far from markers.
-
Unlike silica-based sand, gypsum does not absorb heat. Even on 100°F days, the dunes remain cool to the touch, allowing you to walk barefoot comfortably.
-
A 24-70mm is the most versatile for expansive scales and foreground ripples. A 14-24mm wide-angle is great for dramatic low horizons, while a 70-200mm is excellent for isolating distant dune shapes.
-
Use a rocket blower to remove dust and never use a cloth, which can grind the powder into the lens. Never change lenses on the dunes as gypsum is corrosive to sensors.
-
Yes, leashed dogs are permitted on trails and in the picnic area, but they are not allowed in the backcountry. Always clean up after them.
-
Plan for a minimum of 3-4 hours. Ideally, arrive 1-2 hours before sunset to hike into the dunes, photograph the sunset, and stay for the blue hour.
-
Drones require a special use permit from the National Park Service. Recreational drone use is generally not permitted without advance authorization.
Experience the Wonder of White Sands
White Sands National Park is unlike anywhere else on Earth. The pure white gypsum, the play of light, the minimalist beauty—it's a landscape that challenges and rewards photographers of all skill levels.
Planning a Southwest road trip? White Sands pairs beautifully with Albuquerque's Balloon Fiesta, Ghost Ranch, and Monument Valley. Check out my complete 5-Day Southwest Photography Itinerary.
Love these images? Every photograph in this guide is available as a fine art print. Contact me to discuss sizes, framing, and shipping.
Last Updated: January 2025
Official Park Website: nps.gov/whsa